One of the best parts of growing your own mushrooms is how fresh they are at harvest. The challenge comes a few days later, when a big flush lands all at once and there is more on the counter than you can cook. Fresh gourmet mushrooms are mostly water and they start to lose quality quickly, so a little planning goes a long way. With the right storage habits and a reliable way to dry the surplus, very little of your harvest needs to go to waste.
Here is how to keep fresh mushrooms in good shape for as long as possible, and how to dry them so you have a supply ready for months.
Handling mushrooms right after harvest
Good storage starts the moment you pick. Harvest into a clean, dry container and handle the mushrooms gently. Brush off any substrate with a soft brush or a dry cloth instead of rinsing. Water on the surface speeds up spoilage and turns texture slimy, so save any washing for right before you cook, and keep it brief.
Sort the harvest as you go. Set aside any damaged, bruised or overripe pieces to use first, since they will not last as long as the rest. Trim tough stem bases now rather than later, which makes the next step easier and saves space in the refrigerator.
Storing fresh mushrooms in the refrigerator
For most species, the best short-term home is a paper bag in the main part of the refrigerator. Paper lets moisture escape while preventing the mushrooms from drying out too quickly. Plastic bags and sealed containers trap humidity, and mushrooms stored that way tend to turn slimy within a day or two. If you only have a container, line it with a paper towel and leave the lid slightly open.
Shelf life varies by species. Blue oyster, lion’s mane and shiitake usually keep well for around five to seven days when stored this way. Golden oyster is more delicate and is best used within a few days. Pink oyster is the exception to the refrigerator rule. It is a tropical species and can lose quality quickly in the cold, so most growers keep it cool but not chilled and cook it within a day or two of harvest.
Give stored mushrooms a quick look each day. A firm texture and a fresh, earthy smell mean they are fine. Slimy patches, dark wet spots or a sour smell mean it is time to compost them.
Drying mushrooms for long-term storage
Drying is the most practical way to preserve a large harvest. Dried mushrooms take up very little space, keep for many months, and develop a deeper flavor that works well in soups, sauces and stocks.
Start by slicing the mushrooms into even pieces, roughly a quarter inch thick, so they dry at the same rate. Oyster clusters can simply be torn into individual caps. Lay the pieces in a single layer without overlap.
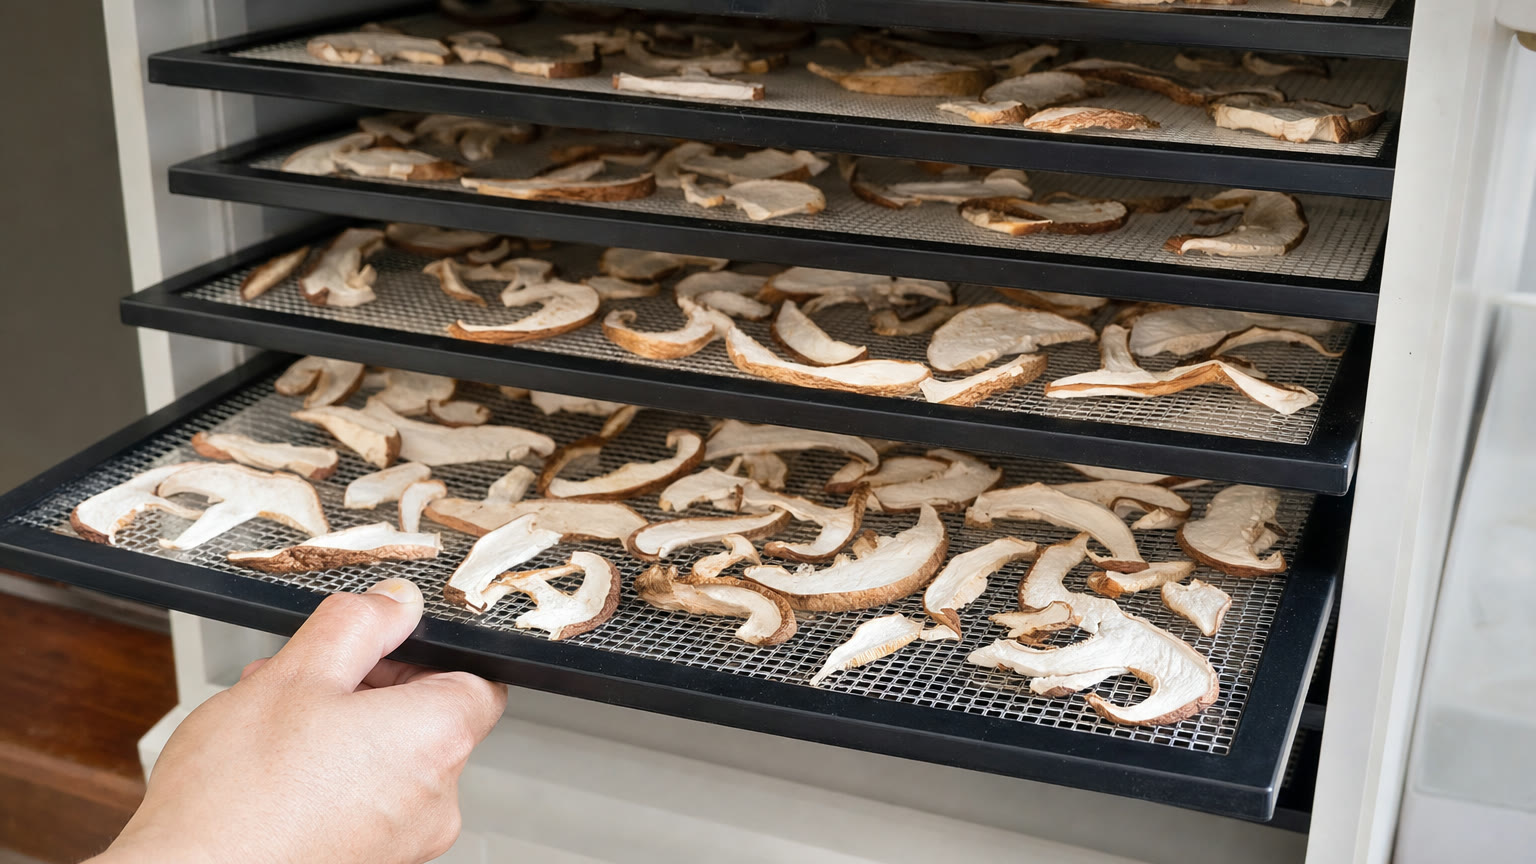
A food dehydrator is the most dependable tool. A low setting, typically in the range of about 110 to 135 degrees Fahrenheit, dries mushrooms gently without cooking them. Depending on thickness and species, drying can take anywhere from several hours to most of a day. The pieces are done when they are fully crisp and snap cleanly, rather than bending. Any leathery or flexible pieces still hold moisture and can spoil in storage, so give them more time.
If you do not have a dehydrator, an oven on its lowest setting with the door propped slightly open can work, as long as you check often and turn the pieces. In dry climates, some growers air dry mushrooms on screens or strung on thread in a well-ventilated room, though this is slower and less predictable in humid weather.
Storing and using dried mushrooms
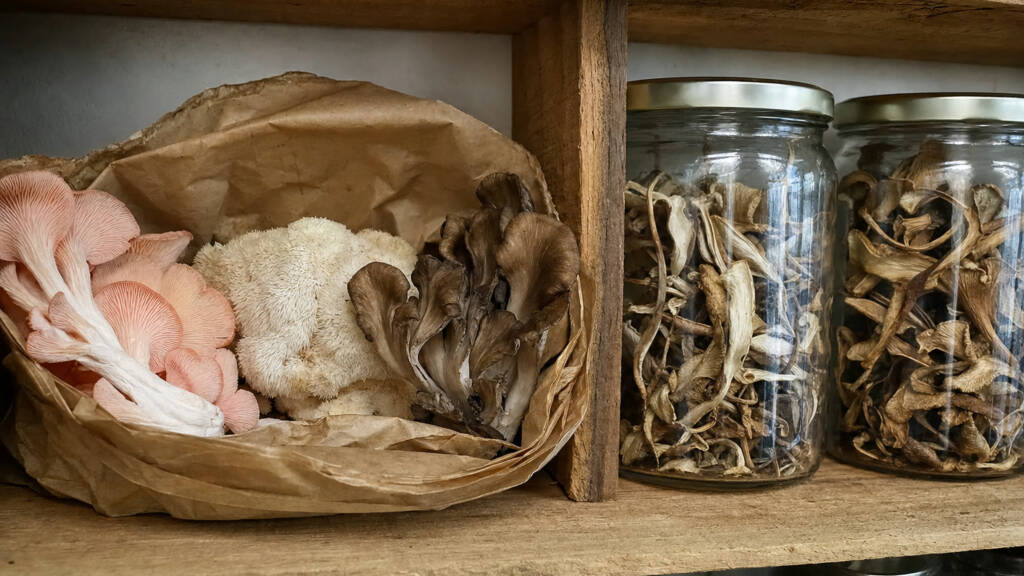
Once fully dry and cooled, move the mushrooms into airtight glass jars and store them somewhere cool, dark and dry. A small food-safe desiccant packet in each jar helps protect against humidity. Label each jar with the species and the date so you can use the oldest batches first. Check jars after the first few days; if you see condensation inside, the mushrooms need more drying.
To use dried mushrooms, soak them in warm water for twenty to thirty minutes until they soften. Keep the soaking liquid, strained through a fine cloth, because it carries a lot of flavor and makes an excellent base for broth or risotto. Some growers also grind fully dried mushrooms into a powder to season sauces and rubs.
Planning storage around your harvest schedule
The easiest way to avoid waste is to plan before the flush arrives. When pins appear, think about what you will cook over the next few days and what will go into drying or the freezer. Many growers stagger their blocks, starting a new one every week or two, so harvests arrive in steady, manageable amounts instead of one large wave.
It also helps to match species to how you store them. Sturdy blue oyster and shiitake are good candidates for drying in quantity. Lion’s mane and oysters freeze well once sautéed. Delicate golden and pink oysters are best eaten fresh, so cook them first and save the longer-keeping species for later in the week.
Keep a little dried stock on hand at all times. A jar of dried mushrooms covers the gaps between flushes and gives you a ready source of flavor for weeknight cooking. Over time, a mix of fresh, frozen and dried mushrooms means you can enjoy your harvest all year rather than only in the days after picking.
A note on freezing
Freezing raw mushrooms usually leads to a soft, watery texture once thawed, because ice crystals break down the cell walls. A better approach for most species is to sauté the mushrooms first, let them cool, and then freeze them in flat portions. Cooked oyster mushrooms and lion’s mane both freeze well this way and go straight from the freezer into a pan or a pot of soup.
With fresh storage for the week ahead, drying for the long term and the freezer as a backup, a big flush becomes something to look forward to rather than a race against the clock. If you are planning your next grow, our beginner mushroom growing guide covers the steps from culture to harvest, and you can Learn to grow with more guides from our team.
Add Comment